HOW TO DO HARDWARE CANON PRINTER SETUP?

heading
dont_wait.png

Unboxing

  1. Remove the tape on the printer box using scissors.
  2. Take out the ink cartridges from the printer box and keep it aside.
  3. If you have bought an ink tank canon printer then you cannot remove it because it is built-in.
  4. Canon printers contain a minimum of four ink cartridges and a maximum of six ink cartridges.
  5. Before placing ink cartridges ensure that you have received the cartridges according to your printer models.
  6. If you find any covers or tapes on the printer, then carefully remove them.

Connect your Canon printer with a power cable that is near to your PC.

Now turn on your printer and set Date and Time. Select your Country and Region when prompted.

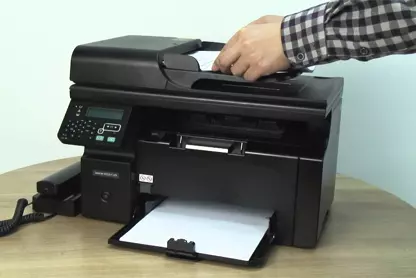
Next, you need to load plain print-able papers in the paper tray.

While finishing up with these steps, remember to insert your ink cartridges as instructed.

HOW DO DOWNLOAD CANON PRINTER DRIVER?

heading.gif

As different printers have different drivers, therefore when looking for Canon printer drivers it is necessary to know everything about your printer and operating system of the computer in which you will download. With the direct link that we have mentioned below, you can download the drivers directly. The driver is customizable according to the users’ needs.

You will get a complete package that includes many software applications that are required to perform a printing job. This also includes scanning software, auto-driver installation and many more. There are several utility tools that you will get along with the driver installation. These utility tools will help you in troubleshooting several issues with the canon printer. Click the driver download button according to the computer OS and get it very easily.

HOW_DO_DOWNLOAD_CANON_PRINTER_DRIVER_1
HOW_DO_DOWNLOAD_CANON_PRINTER_DRIVER_2

HOW DO DOWNLOAD CANON PRINTER DRIVER?

Here you will find the generic driver that provides you access to the basic functionality of your Canon printer. If you also want to download the software and utility tools, then land on the respective printer’s page and get it.

heading.gif

MP Driver For Windows

  1. If you have the driver installation CD, then follow the below instructions, open the file that is downloaded from our website and follow on-screen instructions.
  2. Before you begin with the installation process of the software, switch off your Canon printer.
  3. Now turn on your computer and insert the driver installer CD.
  4. Click Run Msetup4.exe, if you see the AutoPlay window opened on your computer.
  5. Next, click on Continue. Now select Easy Install and when you see a list of contents on the window, confirm that you need for the printer, and then click OK to Install.
  6. Go through the term and conditions properly before the setup screen appears.
  7. When prompted choose USB as the connection type and connect your USB cable with the computer and with the printer. Now switch on the printer.
  8. When you turn on your printer, the Setup will start installing. Wait for few minutes and let it finish.
  9. If your computer display user registration screen, click Next and enter all the detail that is required. Now click Finish to complete the installation process.

CUPS Driver For Mac

  1. The latest Macintosh computer does not support CD drivers while doing Canon wireless printer setup. If your Mac computer has a DVD drive, but the CUPS driver file is not auto-populated, then insert the CD and follow the below steps.
  2. To install the Canon printer setup drivers on Mac computer, open the applications folder from the Mac finder.
  3. Double click to open the Utility folder and click on the Disk Utility.app file.
  4. Now go to the menu bar and open the File tab and click on Open Disk Image.
  5. It will allow you to select the disk file that you wish to install.
  6. Select the ISO disk image file. Now click the Open button and the Canon printer setup installation package that is placed on the Mac desktop.
  7. Now find the .dmg file in the download folder and double click it to run.

HOW TO USE A CANON PRINTER?

heading

Well, the Canon printer is a widely known company worldwide. It is very famous for providing modern printer its best features that fulfill every modern need. Canon has a wide variety of printers. If you have bought a new Canon printer then you will be able to get amazing services by it such as- quick print, scan, copy or fax.

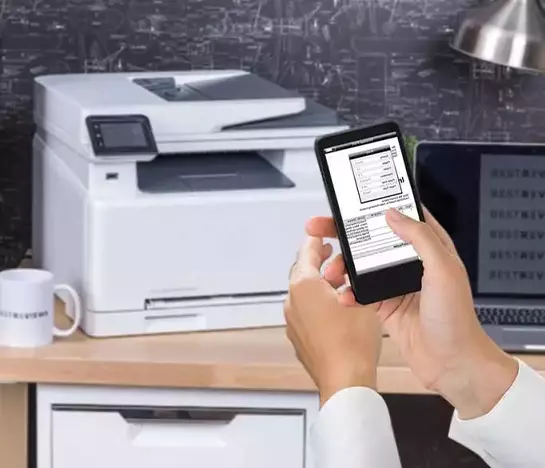
Canon printers also print when connected to a smartphone. So now onwards you don’t need to transfer the file from your mobile to the computer, because of the easy connectivity with mobiles and tablets as well. You are required to do Canon wireless printer setup to avail the Canon printer services. Here on this page, you will get to know about so many things on Canon printer, right from unboxing, Canon printer setup to Canon printer issues’ solutions.

HOW_TO_USE_A_CANON_PRINTER

HOW TO PRINT DOCUMENTS OR PHOTOS USING CANON PRINTER?

heading.gif
HOW_TO_PRINT_DOCUMENTS_OR_PHOTOS_USING_CANON_PRINTER

To print any document or photo using Canon Printer follow these below steps:

  1. First, check that your canon printer is turned on and is ready to print (this is can only happen when you have downloaded the Canon printer software and drivers).
  2. Download the picture that you want to print on your computer. If you want to edit the image do it before giving print command and save it.
  3. Now press Ctrl Key + P to give direct printing command.
  4. Make sure that you have inserted plain papers inside the input tray before giving print command. The standard size of print sheets is- A4.
  5. Enter the number of copies you want to print and type of paper to use and other details.
  6. When clicking on Print, a message window will appear on the screen, click OK.

HOW TO SCAN USING CANON PRINTER?

  1. Before scanning makes sure that your Canon printer has this feature. If you have an all-in-one canon printer model than you can easily print as well scan and perform other features as well.
  2. After connecting your printer with the computer, turn it on (if you have turned it off).
  3. Now open the scanner, lift the scanner glass and insert the document or image that you want to scan.
  4. Place your document face down under the scanner glass lid.
  5. Close the scanner lid firmly. Now go to your computer and click on the search box adjacent to the Windows icon.
  6. Enter Fax and Scan, now open the folder from the result. Now click New Scan, it will open a new window.
  7. Now can see your canon printer name and model number, if you see something else there, then change it.
  8. In the drop-down menu, select the type of document you wish to scan in the Profile section.
  9. Select file typeset the resolution and other required details. Click preview before you scan the document. This option will ensure your document in the scanner.
  10. If everything seems right, then click Scan.

HOW TO DO CANON PRINTER SETUP FOR FAX?

  1. To turn on the fax feature in the canon printer, first, switch it on.
  2. Then go to the control panel of your printer and use the left or right arrow to see more features.
  3. There you will see Fax settings, click on it.
  4. Now select the telephone line type and tap OK.
  5. Click the Fax button to get back on the Fax standby screen.
  6. You have done with Canon printer setup for Fax as well, now you can send a fax or receive a fax.

HOW TO SEND THE FAX USING CANON PRINTER?

heading
  1. To send or receive a fax, don’t forget to turn on your printer.
  2. Tap on the fax button and standby fax screen will get open.
  3. Now place the document that you want to scan with face down under the Scanner platen.
  4. Next, you need to alter/crop the document and adjust the contrast.
  5. It’s time to dial the recipient’s fax or telephone number on the printer using the touch screen of your canon printer.
  6. If you wish to send color fax then send the Color button when prompted otherwise press the Black button.
  7. After your document got scanned press OK to send it and then place the next document.
HOW_TO_SEND_THE_FAX_USING_CANON_PRINTER

HOW DO GET DUPLEX COPY FROM CANON PRINTER?

heading

Other than sending a fax, taking out the printing and scanning a document, an all-in-one canon printer also supports Duplex copy. So below are the steps to get the Duplex copy from your Canon printer.

  1. To get the Canon printer duplex copy, position the document or image on the scanner glass. Place that face of the page down of which you want to get Duplex copy.
  2. Note, if you want two-sided copying, it means a copy of two different pages on both sides of the paper then set the settings according to that.
  3. Click the Copy button on your canon printer or the Copy icon on the control panel menu.
  1. Select the 2-sided option and it will take you to the standard copy tab, where you can select the 2-sided and press OK.
  2. If you want, you can change the settings, for example, Portrait or Orientation and Long Side or Short Side stapling and then tap on OK.
  3. On the printer’s screen you will see the option of going back to the previous screen, now place the next document to get Duplex copy and press OK.

How To Connect Canon Printer To Wifi?

heading

To connect your Canon wireless printer with WiFi you have two options either you can simply connect it using USB cable or can connect your wireless printer with your WiFi. Below is the step-by-step guidance on Canon wireless printer setup with WiFi:

  1. Make sure that your printer is on, after downloading the Canon printer software and driver that you also find on our website, it’s time to connect your Canon printer with wifi.
  2. Connecting your wireless printer directly with WiFi with which your computer is also connected allows both of them (canon printer and computer) to connect as well.
  3. Press the Settings button, there you will see the arrow button and once you reach Device settings, press OK.
  4. Press the arrow button until you see the wireless LAN setup option, and then press OK.
  5. Now your printer will start searching for a WiFi network, check it will start blinking light.
  6. When your printer finishes its search, tap on your wifi enter the password and press OK or Connect.
  7. If your search is taking too much time then press Stop and again start the search or you can change the setup settings from wireless to the standard setup.

How To Connect Canon Wireless Printer With The WPS Button?

To connect your canon printer wirelessly using WPA push button, you need to follow a few steps:

  1. Make sure that your printer is on.
  2. Press & hold the printer Wi-Fi button on the top of your printer (sometimes it is also given in the Wireless Setup menu), and press until the alarm lamp flashes once.
  3. Make sure that the lamp flashes blue light then go to your access point and press the WPS button within 2 minutes.
  4. The WiFi lamp on the printer will continue to flash while searching, and when they get connected the power and Wi-Fi lamp will flash.
  5. When successfully your canon printer and wifi get connected, the power lamp and WiFi lamp will stop blinking and remain still.

HOW TO CONNECT CANON PRINTER WITH COMPUTER?

heading

Windows

  1. To connect your Canon printer with a computer Canon wireless printer setup is important. First, you need to download and install the required drivers and software.
  2. Meanwhile, you can prepare your canon printer to get connected with your Windows computer.
  3. Make sure that the printer is switched on.
  4. Now turn on your computer and click on the Windows icon.
  5. Click Settings, then the Windows Settings window will get open on your screen.
  6. Now click on Devices. There on the left side under the Home menu, select Printers & Scanners.
  7. Printers & Scanners window will display. At the top, you will see Add a Printer or Scanner option.
  8. Click on that, and your computer will start looking for a new printer.
  9. Once the search is finished, your printer will automatically get connected to the computer.
  10. Now you can use your canon printer for printing your documents or images.

Mac

  1. Click on the Apple icon, present on the top left corner. Then, in the drop-down menu, select System Preferences.
  2. This will open to a new window. There you will see Printers & Scanner option, click on it.
  3. Click the ‘+’ sign to add the printer with your Mac. A new window will get open.
  4. Click on the IP icon and fill all the details.
  5. Add the Canon printer with your Mac. You can print a test page to see where your printer is performing correctly or not.

HOW TO PRINT USING MOBILE EASILY?

HOW_TO_PRINT_USING_MOBILE_EASILY

Printing from mobile is the easiest thing, you don’t need to transfer any file or image to a laptop or computer. You can print from the mobile on the go using such applications; AirPrint, Google Cloud Print, Canon PRINT/Inkjet Selphy, Canon Easy Photo Print, and more that can support Android or iOS devices. Below we have mentioned the solution to get easy print using a smartphone.

AIRPRINT SETUP

  1. Ensure that you are using Versions of Apple devices such as iPad (all models), iPhone (3G or more) or iPhone touch (3rd generation or later one).
  2. Make sure that the canon printer you have bought can connect with iOS devices.
  3. Another thing you have check is- your canon printer and Apple device should be connected with the same network.
  4. Check whether your Canon printer is turned on and connected well to the network.
  5. Whatever app you use to print, tap the Forward or Operation icon to show the menu options.
  6. Tap Print from the menu options, when the printer window displays choose your printer model.
  7. To add more copies set it accordingly.
  8. Now give the printing command and wait until you get the output.

How To Use Google Cloud To Get The Print From Canon Printer?

If you wish to use Google Cloud to get the printout, first you need a verified email id and password to log into your Google Account.

  1. Make sure that the canon printer model you are using must support the Google Cloud Print.
  2. Meanwhile, check that your mobile should be connected to the high-speed internet.
  3. Put the A4 size plain sheet in the paper tray to get the print on.
  4. Ensure that your canon printer should be connected with the same router or WiFi your mobile is connected to.
  5. Turn on your canon printer and tap Setup on the Home screen.
  6. Press the Web Service Setup and then click OK.
  7. Now tap on the Web Service Connection Setup and press OK.
  8. Complete the Google Cloud Print setup and press OK.
  9. After the registration, you are asked to choose Yes or No, click on Yes.
  10. Set the language and press OK on the authentication URL screen that will open.
  11. Now, you have to enter the URL on the browser of your mobile phone or computer and sign in.
  12. When the printer registration in Google Cloud gets completed tap, Finish.
  13. On your screen your will the registration message, now you need to press OK.
  14. You are finished with the Google Cloud Print registration and can print easily using your mobile or computer.

How To Print From Android Phone?

  1. To print from your Android phone you need Canon PRINT Inkjet/Selphy app.
  2. Go to Google Play Store and enter the name in the search box. Google Play will display so many other apps as well for printing and scanning.
  3. Tap on the app and install it in your android smartphone. Make sure that your printer will be connected with wifi, and your mobile phone as well.
  4. Open the app and it will automatically find your printer.
  5. Now open the document or image you want to print, place A4 size sheet in the paper tray and press Print option.

How To Print From The Ios Devices?

Before you start printing from your iPhone or other iOS devices, make sure that you have installed the Canon Easy-PhotoPrint app.

  1. You can install this app from Apple iStore.
  2. After its successful installation process opens the app and tap on the document or photo that you want to print.
  3. The app will automatically recognize the printer is connected to the same wifi.
  4. Now, open the document or image you wish to print and give Print command.
  5. The printer will produce your commanded output.

GET TROUBLESHOOTING SUPPORT FOR CANON PRINTER

heading

Canon printers work very efficiently and yield expected output. If you have a canon printer at home or work, then all your needs from printing to scanning documents, the fax will get solved at one go. But at times canon printers do give you troubles making your work stuck in mid.

You may face issues with printing, connecting the printer to wifi or computer or even sometimes in turning it on. Fortunately, we have a set of solutions directed by the Canon printer support experts. See below to know about the issues and get their solutions.

display_error

HOW TO TURN CANON PRINTER ONLINE TO OFFLINE?

heading.gif
need_canon_usa

We understand that your work has stopped because of the issue, but don’t worry because here we have mentioned the solution. Follow the below steps to troubleshoot your problem.

  1. Press Windows Key + R together, Now type Control Panel and press Enter.
  2. You will reach a new window showing multiple options.
  3. Now open the Hardware and Sound folder and search for your Canon printer there.
  4. Select your Canon printer and right-click on it. Now, select See what’s printing.
  5. In the bar menu, you will see the Printer tab, click on it.
  6. In the drop-down menu select, the Use Printer Offline.
  7. This step will turn your printer online and your printer will start printing normally.

Why Canon Printer Is Unable To Scan?

  1. If your printer is not connected with the same network to which your computer is connected, then it will not scan your document or image.
  2. Ensure that you have downloaded the Scan utility Tool along with the Printer Drivers on your computer. If yes, then try to scan directly using the tool.
  3. Now you need to select the network version at the top of the tool.
  4. If the Utility tool is allowing you to scan then turn off and turn on your computer and then turn off your printer, as well.
  5. Now after waiting for a few minutes, turn on the printer to check if you can print from its control panel.

Why Is My Canon Printer In Error State?

At times when your canon printer shows an error state issue, it means that there is some problem with the printer itself, or it may also cause because of the new window update, poor connectivity or so on. Below we have mentioned the solution for canon printer error state issue, have a look on it.

  1. The printer in error state problem widely happens in Windows 10 computers, mostly when Windows 10 got any new update. The preferred solution for the issue is to turn off the canon printer and computer as well, then turning it on after a few minutes.
  2. If the canon printer error state issue is not solved yet, then follow the further steps to get rid of this problem.
  3. Verify the connection of your canon printer with router and computer as well. Sometimes because of poor connection error state issue occurs.
  4. Also, check whether the cover of your printer is open or not and if there is any paper-jam that occurred.
  5. Try this solution when you are facing a canon printer error state issue. If the problem is not solved yet, then you can try more troubleshooting steps to solve the issue.
  6. Open your Device Manager in your computer’s control panel.
  7. In the view menu, choose Show hidden devices.
  8. Expand the ports and then under the Printer Port, select Properties.
  9. Click on the Port Settings tab and select Use any interrupt assigned to the port.
  10. Now click OK to save the changes that you have made and then reboot your system to get better user experience.

Why My Canon Printer Is Not Connecting To Wi-Fi?

When your Canon printer is not connecting to Wi-Fi, first check your connection. Sometimes, because of the poor connection or slow speed internet printer doesn’t connect with the Wi-Fi.

  1. To check the status of your printer, print a LAN test report.
  2. Tap on the Settings button on the top of your printer’s Home Screen.
  3. Choose Device Settings and tap OK. Now select the LAN settings and press OK.
  4. Now tap on Printer LAN details and click OK to confirm your selection.
  5. Again you need to press OK to print the page.
  6. The output page will show you the signal strength and connection quality. If you see a fall in the signal quality, then check for the frequency that is supported by the printer as well as provided in the settings.
  7. If the connection quality is poor, then shut down your Wi-Fi and printer, after waiting for a few minutes then turn it on again.

Why My Canon Printer Is Not Working?

  1. First, ensure that you have turned on the canon printer and connected to a working electricity socket.
  2. Now go to your computer and open Printers & Scanners. There see if your printer is listed or not. When you are trying to get the printout from your canon printer and you have already installed so many printers in the list, it can create confusion for the computer and maybe your printer left unrecognized.
  3. So, delete other printers from the list and re-add your canon printer from the list.
  4. Check that your printer is connected with a high-speed network. A poor network can stop your printer to work properly.
  5. Sometimes the printer stops working because of the paper jam issue as well. So, ensure there is nothing like this happened with your printer.
  6. Open the printer’s setting and delete all the paused printing commands, multiple printing commands can also make your printer stop.
  7. Turn off your printer and computer, wait for few minutes and turn both of them on.
  8. Now again try printing, these steps will surely rectify the issue.

Why Is The Canon Printer Not Responding?

  1. Conon printer may suddenly go unresponsive sometimes. So, if this is the situation you are facing, then immediately turn off the printer.
  2. After waiting for few minutes restart your printer.
  3. If still your printer is unresponsive then turn off the entire printing system, this time including your computer and wifi as well.
  4. Give all of the leisure time and meanwhile, you can read the manual or check the wiring of your printer.
  5. Then after few minutes re-start everything and see what the status is right now.
  6. Sometimes because of the IP conflict printers stop working. Check if your canon printer is going through this problem.

Why Is Canon Printer Printing Black Pages?

When a user has been utilizing the printer for so long without maintaining even its basic maintenance needs, then at some point print-head may stop working. At this point, your Canon printer will start printing blank pages and need cleaning

  1. Go to your computer’s Settings and open Devices & Printers window.
  2. Now find your printer from the list and select it. Now right-click on your canon printer that is printing black pages.
  3. Now click on the Preferences under the Devices Settings. In the new window, you will see Services, click on Clean Printhead.
  4. Repeat the process of cleaning the print head, so that it can be cleaned properly and become well enough to print papers normally again.
  5. After the cleaning process is done, now try to print and see if the printer works properly.

Frequently Asked Questions (FAQs)

  • 1How To Reset The Factory Settings In Your Canon Printer?

    While doing factory settings in your canon printer, make sure the printer should be free from any error. It is quite simple, you need to follow the below steps to reset factory settings.

    Turn on your Canon printer.

    In the Home menu of your printer, go to the Setup option using the navigation arrow.

    Go to Device Settings and tap OK.

    Here you have to tap on Reset printer settings option and confirm the change by tapping OK.

    Now, you can re-start with the steps to change the Factory settings.

  • 2How Do I Clean My Canon Printer?

    When printing your documents or images if you find any issue with the print quality of the canon printer, then you must carry on its cleaning process. Clean the ink cartridges attached to your canon printer, because they can be the culprits for hampering your printing job. Remove cartridges from the related slots and take the printhead out carefully.

    Start the cleaning process by the below steps:

    Immerse a cleaning sponge in the rubbing alcohol and clean the printhead contacts cautiously.

    If you find any blockage on the ink nozzle, wipes it off.

    Or if you find excess ink on the nozzle opening wipe that off as well.

    Now place the printhead and cartridges inside the printer and check if the quality has improved or not.

  • 3How Do I Repair My Canon Printer?

    Well, if your canon printer is not working properly and you having issues by following the tips here on this page you can repair your Canon printer.

    Hence, by categorizing the problems that generally cannon printer faces, we have given the solution to this problem on this page you can read and follow to apply solutions’ steps in your printer.

  • 4How Do I Change The Country Or Region On A Canon Printer When I Moved To A Different Country Or Region?

    Turn off your canon printer and find the Cancel and Reset button, which should be on the top right corner.

    Press the Locate button and Power button together at the same time.

    Release both the buttons when you see light blinking twice.

    If the Copy button is flashing, let it stop and go green firmly.

    Now press the Cancel or Reset button until you get the desired country code.

    After choosing the correct country code, next, you need to press the power button to save the settings that you have made.

    Finally, turn off the printer. The changes you have made have been saved and the location has been changed according to your current location.

    Generally, in Canon smart printers, location preference gets changed when you move to a different place.

  • 5How To Change Your Network Connection?

    Wired To Wireless:

    If your printer is currently using an Ethernet connection, then these steps can help you in changing your current wired connection to wireless connection.

    Steps for converting are easy and less time-consuming.

    Unplug the Ethernet cable connected with your canon printer.

    If you have already downloaded the complete driver and software package for the Canon printer, then you should have the Wireless Utility tool.

    Before you proceed to run the Utility Tool, enable the Wireless settings on your canon printer first.

    Now you have to follow the instruction displayed on the screen to establish the network.

    Add a printer to the network by clicking + symbol. Your canon printer will get connected to the wireless network, now.


    USB to Wireless:

    If you want to change the USB connectivity of your printer to wireless, then make sure that you should have a high-speed internet connection.

    Disconnect the USB cable from your computer and printer before you proceed to change the settings.

    Now tap on the Wireless icon on your printer home screen and activate the setup wizard.

    Follow the on-screen instructions, fill all the needed details and build the wireless connection on the printer.

    If you have not installed the complete package of printer drivers and software then install them now. Or if you want you can also install using CD.

    Click on the Change Connection method and follow the prompts

    Click Next and then Complete or Done, now again click Next and then Exit.

  • 6How To Clean Canon Printer’s Print-Head Via Computer?

    Cleaning of the Canon printer print-head is so simple that you can perform it by below steps:

    First, open your computer’s Control Panel and then open the printer setup window.

    Click on the Hardware & Sound and then Printers.

    The option names may differ depending on the OS versions that you have.

    When you see find your printer name’s displayed on the screen, select it and right-click. Then choose the Printer Preferences.

    A printer Setup window will get open, ensure that your printing machine is turned on.

    Now click on the Maintenance tab then click on the Cleaning. Select Execute.

    When the cleaning process is completed, your computer will display the Nozzle Check window box.

  • 7Can We Use An Ink Cartridge In The Canon Printer?

    You cannot use different printer cartridge in a different printer, for example, if you have Canon Printer you cannot use HP printer’s cartridge in it. The printer’s cartridge is meant for supporting the printheads of a specific printer. Moreover, the ink quality also varies in different printers’ brands. Don’t lead any mismatch in your canon printer, because it can lead to a more daunting issue.

  • 8How To Refill Ink Cartridge?

    Any printer cartridge is refillable, but most experts do not recommend doing this, because you may face some issue with print quality. Here is the guide to refill your canon printer’s cartridge

    Ensure that the ink cartridge you are trying to refill is empty. Remove the ink cartridge from the printer.

    You can purchase an ink refill kit of canon printer’s cartridge from the ink supply store.

    Collect a 30cc syringe along with a needle, ink to refill and a thumb drill.

    Remember to keep the ink cartridge on a paper towel while refilling. This will save your floor or table to get dirty if in case the ink leaked.

    Choose the ink color that you wish to refill into the respective cartridge.

    Choose the color you want to refill, and insert the needle to pull the respective color inside it.

    Now it’s time to locate the hole in the cartridge. Cover the exit hole with tape to avoid any leakage.

    Make a small hole in the ink cartridge using the thumb drill just behind the ink cartridge label.

    Push the ink inside the hole that you created in the ink cartridge.

    Now take the needle out of the cartridge and the container then place the top back on the ink so that it won’t spill around.

    Next, you have to remove the tape covering the sponge area and then reinstall the ink cartridges.

  • 9How Can I Change Ink Cartridge In The Canon Printer?

    Before you proceed with the process, make sure that your canon printer is on.

    Now unlock the front door or the scanner lid of your printer (this can vary from the printers’ model to model).

    Pull the output tray cover and now, the FINE cartridge will move and become ready for replacement.

    Push the empty FINE cartridge down to remove it, until you hear the click sound.

    Now take the new FINE cartridge from its package and tear the protective tape from it.

    Insert it inside the fixed slot given in your canon printer and push the FINE cartridge until it locks into place.

    Time to close the FINE cartridge cover, the replacement procedure is completed. Now you can get the printout from your canon printer.

  • 10How To Reset The Ink Cartridge In The Canon Printer?

    While starting the procedure, turn off your Canon printer.

    Now press the Power button along with the Stop button. Release the Stop buttons and keep holding the Power button.

    You need to press the Stop button again until the printer displays the symbol O.

    Now press the Stop button 4 times again and again and then press the Power button twice.

    Turn off your printer completely, this will reset the process.

    Disable the printer’s power button and USB cable connection and open the ink cartridge door.

    Turn on your printer and reconnect all cables back.

    Close the cartridge access door and now you can release the Power button. Now you can reset the ink cartridges.