Canon Printer Installation and Setup Guide

Printers have become an essential part in our day-to-day life as it fulfils not only all the necessary office works but also personal task. Canon is master in manufacturing almost all variety of printers whether a laser printer or normal. But sometimes, it becomes very difficult for non-tech to use these devices, especially when using them the very first time. Due to lacking of technical knowledge, one can’t make the Canon Printer usable properly for printing, scanning or faxing. Don’t feel blue! Tech Support Expert team is always there for you. Here, grab the best technical advice for Canon Printer Installation and setup. Install the printer driver, USB driver on your Windows and Mac to get the printout hassle-freely from your Canon printer.
Relevant Procedures For Canon Printer Installation
Follow the provided steps one-by-one to gain Canon Printer Installation process in handy way. Have a glimpse at below points and perform the same:
Procedure 1: Installing a USB Printer For Windows And iOS
Go through the given instructions to install an USB printer for both Windows and iOS system:
- Read the instruction mentioned on the book which has come along with the printer. You can even also find the desired information on the Google by simply searching for ‘’manufacturer model support’’
- Now, connect the printer to the computer with a USB cable
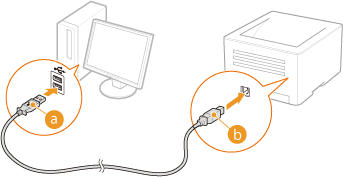
- Turn-On your printer now
- Wait for your system to detect the device and install the printer
- Install the printer software too
- In case, you don’t have the disk, download the drivers from the manufacturer’s website
- Run the downloaded file to install the driver. Now your printer is all-set to print, scan or fax
Procedure 2: Install A Network Printer For Windows
You can connect your printer to a network via wired or wireless ways.
Wired: With a wired Ethernet network cable you can simply connect your device and generally doesn’t require any further network configuration.
Wireless: Connect your printer with a Wi-Fi network to wirelessly connect the device.
Desired Steps You Need To Follow
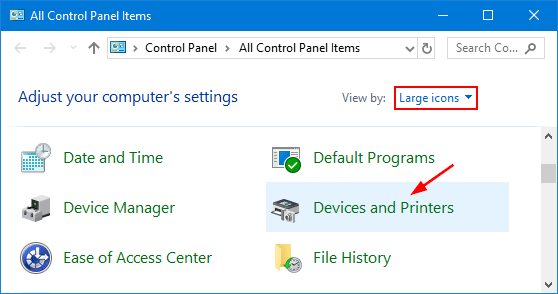
- Open the Control Panel on your Windows

- Select ‘Devices and Printers’
- Click on Add a Printer
- Now, choose ‘add a network, wireless or Bluetooth printer’

- Select your wireless printer from the given-list and click Next

- Now install the drivers: During installation make sure your system is connected to the internet. In case, you do not have internet, you can use the CD which came along with the printer

Procedure 3: Install A Network Printer For iOS
Follow the steps noted below:
- Click on the Apple menu and select System Preferences
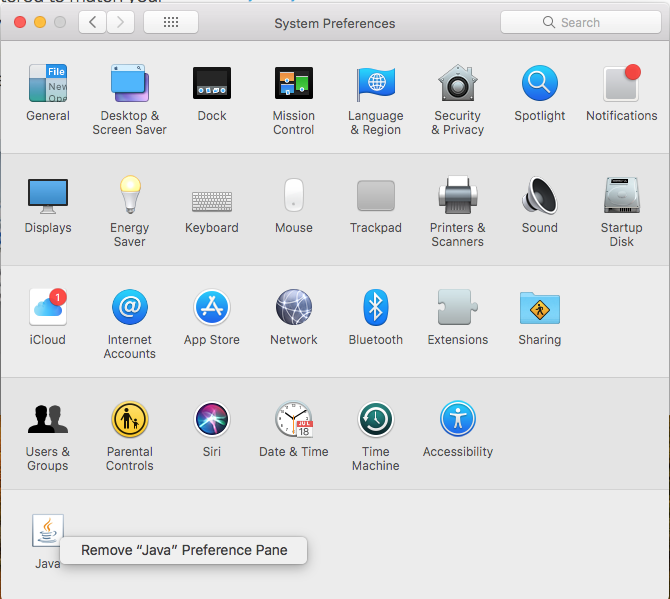
- Open for Print and Fax option

- Tap on ‘+’ symbol to add your printer
- Select your network printer from the default tab
- Click Add and now your network printer is installed on iOS and you can frequently use your printer for printing from iPhone, iPad or iPod
Procedure 4: Install A Canon Wireless Printer
- First, make sure your printer is plugged-in and it is ON
- Check if the printer has installation software
- Now, connect the printer to the wireless network
- Make sure your computer and printer is on the same network
Obtain Canon Printer Installation Support For One-Stop Solution
Don’t get disheartened! If the above written information is not beneficial for you as we have knowledgeable as well as talented tech-specialists work all day all night continuously only for your help. You need to associate with them via dialing on given helpline number and obtain the reliable and trustworthy Canon Printer Installation Support at reasonable cost.
Frequently Asked Questions (FAQs)
How Do I Install My Canon Printer To My Computer?
Below are some easy directions for installing your Canon Printer on your personal computer:
- Connect your Canon Printer to your PC using USB.
- Click on the Start button on your computer system
- Click on ‘Devices’ and then, choose the ‘Printers’ option.
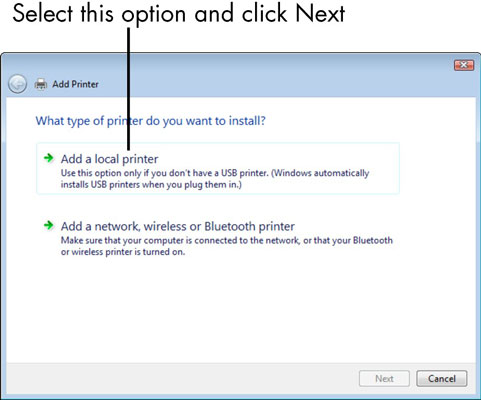
- Next, you need to select ‘Add Printer’ and click ‘Add a Local Printer’.
- Select ‘Next’ and then download printer drivers from the manufacturer’s website.
- Click Finish after selecting your printer’s name.
By following these steps, you will be able to complete the Canon Printer installation with ease.
How Do I Setup My Canon Printer Wirelessly?
Have a glance at the instructions that you need to follow carefully for a complete setup of Canon Printer wirelessly!
- On the Start menu, you should choose ‘Devices and Printers’
- Tap on ‘Add a printer’ option.
- Select ‘Add A Network, Wireless Or Bluetooth Printer’ from the ‘Add Printer wizard.
- Select your printer and then click ‘Next’.
- Install the printer drivers and complete the on-screen instructions and click ‘Finish’ option.
With these steps, you can easily setup Canon printer wirelessly without any kind of obstacles.
How Do I Reinstall My Canon Printer?
- Take USB cable to connect the computer and Canon printer.
- Turn of the printer.
- Press the ‘Start’ button from your keyboard and select the ‘Control Panel’ option
- Go to ‘Hardware and Sound’ and then ‘Devices and Printers’.
- After that, select ‘Add a Printer’
- Choose an option says ‘Local Printer’
- Click the “Canon” printer and then ‘Next’.
- Next, you should give a name to your printer and click ‘Next’
- Click the ‘Finish’ option.
By following these steps, users will be able to reinstall the Canon printer. To ensure its working, you can print a test page.
How Do I Install My Pixma Printer Without The CD?
Walking through the below steps carefully will help you to install Pixma printer without using installation CD:
- Firstly, establish a connection between your Pixma Printer and computer using USB Cable
- On your computer, click on ‘Start’ option and select ‘Devices and Printers’ option
- Choose ‘Properties’ by right-clicking on your printer.
- Press ‘OK’ and then follow the on-screen instructions to install the drivers of your Pixma printer.
Once done with the installation of your Pixma printer, you should print a test page to ensure it’s working properly.
How Do I Get My Printer To Connect Wirelessly?
People can easily connect their printer wirelessly. For that, you need to walkthrough the following steps. Check it out:
- On your first step, turn on your printer.
- Next, hold the Wi-Fi button for a couple of seconds until an alarm light blinks.
- After that, press the WPS button if alarm lamp starts blinking blue.
- Once the printer established a connection, Wi-Fi and power light stops flashing.
You can have a printout to confirm to make sure your printer has a stable wireless network.
How Do I Install A Printer Driver?
You can’t work on any printer until you install all the necessary drivers. However, you can easily install the printer drivers by following the below-mentioned steps.
- For that, you should go to go to Control Panel from your computer
- Select ‘Hardware & Sound’ option and choose ‘Device Manager’
- Look for your printer and right-on it.
- Now, select ‘Run as administrator’ to install the drivers of your printer.
- Afterward, click on the properties and then go to ‘Advanced’ option
- Reach out to ‘New Driver Tab’ and follow the on screen instructions
How Do I Connect This Phone To A Printer?
Are you one of those who want to connect a phone to your printer? Do you want to have a printout from your smartphone? Follow the below-mentioned steps carefully:
- Firstly turn on your printer and make sure WI-FI network is stable.
- Now, you need to go to Wi-Fi setting from your mobile phone.
- Next, you should find out the same network that your printer is using.
Once done successful, you can easily make use of your printer to print various things from your mobile phone.
How Do I Get My Computer To Recognize My Printer?
- By just following these steps, users can easily get their computer systems to recognize their printer.
- First, place your printer next to your computer system, turn it on.
- Plug one end of the USB into your printer and the second one into your Laptop.
- Use power cable to connect your device to the power supply.
- Next, you should install the necessary software using the installation CD.
- Once you install the drivers of the canon printer, you can start working on your device.
For the conformation, you can print a test page and check if any inconveniences take place
Can I Install Canon Printer Without CD?
Are you one of those who don’t want to use an installation disk to install canon printer? Don’t worry! You can perform the installation using a USB Cable
- For that, plug the USB cable to your PC.
- Turn on the printer and go to your PC to press the ‘Start’ button.
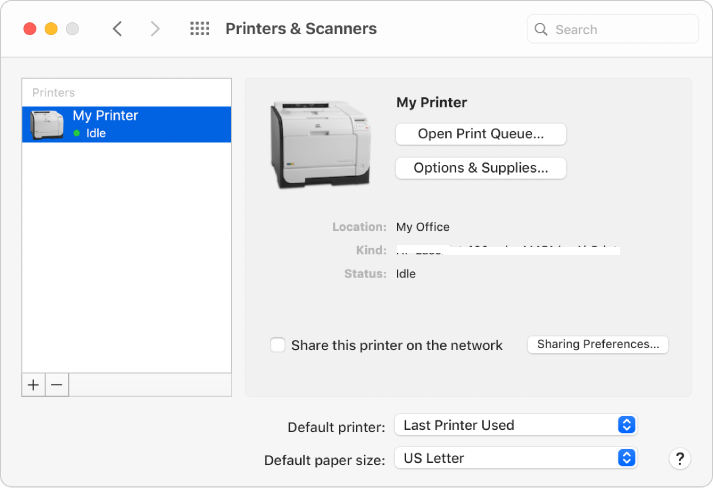
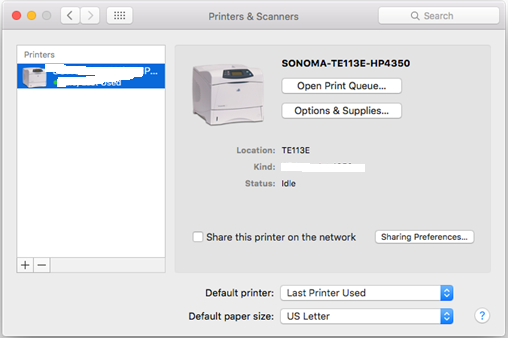
- In the search box, type ‘Printers & Scanners’.
- Now, click on ‘Add A Printer or Scanner’ and select the name of your printer.
- Once you click, a printer’s installation window appears.
Follow the on-screen instructions to complete the Canon Printer installation process.
How Do I Connect My Canon Printer To My Laptop Wirelessly?
Have A Glance At A Complete Procedure In A Step By Step Manner:
- Firstly, connect to the Conon printer to the home network.
- Connect canon printer laptop.
- Go to the ‘Start’ menu to open the ‘Control Panel’ option
- Here, users need to select the ‘Devices and Printers’ option.
- Then, click on ‘Add A Printer’ and go with ‘Add A Network, Wireless or Bluetooth Printer’.
- Select your network printer.
- Follow the on-screen prompts to complete the driver installation automatically.
Doing so will help you to connect your HP printer to your Laptop wirelessly without any hassle.
